Creating Tasks
The Continuous Collection Task automates image downloads from a specific vendor. You can schedule recurring tasks (satellite image downloads) that capture imagery for a defined Area of Interest (AOI), within a set date range and frequency thus eliminating the need for manual collection.
To create a task, do the following:
-
Click the Acquire module, and then click the Continuous Collection sub-module.
-
Click the + icon to create a new continuous task. The Create New Continuous Collection Task panel is displayed.
-
In the Create New Continuous Collection Task panel, do the following:
Field Description Name Enter a unique name for the task (e.g., S1-SouthEastAsia).Description Provide a short explanation (e.g., “Collection for South East Asia region”). Vendor Select a satellite provider from the dropdown (e.g., Sentinel-1).Start Date Choose the date when the image collection should begin. End Date Choose the date when the task should stop executing. Frequency Select how often to collect imagery:
•Daily
•Weekly
•Monthly
•CustomInterval (Visible only if Customis selected)Enter a numeric value to define how often the system should execute the task. For example:
•1= every unit
•2= every second unit (e.g., every 2 days)Unit (Visible only if Customis selected)Select the unit of time to pair with the interval. Options include:
•Day
•Week
•Month
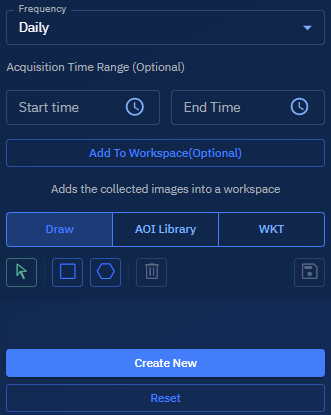
For example,Interval: 3+Unit: Day= Collect imagery every 3 days.Start Time (Optional) Define the earliest time of day to begin image collection. End Time (Optional) Define the latest time of day to stop image collection. 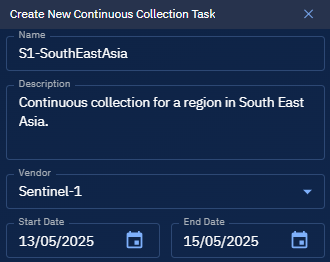
-
Click Add to Workspace to automatically save collected imagery to a shared workspace. This step is optional but useful for collaboration and data access.
-
Define the Area of Interest (AOI) for imagery collection:
Option Functionality Draw Open a map interface and draw an AOI using a Rectangle or Polygon tool. This is a mandatory step. AOI Library Select a saved AOI from your organization’s library. WKT Paste a WKT (Well-Known Text) geometry string to define the AOI. Select AOI Tool Use the arrow icon (bottom-right) to select an AOI directly from the map. -
Click the Save button to save the AOI.
-
Click the Create New button to execute the task.